Off-the-shelf décor can feel soulless. You walk into a high-street shop, spot something passable, check the price tag, and put it straight back. Sound familiar? The truth is, the most stylish homes you see in magazines are rarely filled with expensive ready-made pieces. They're filled with personality, and that personality comes from making things yourself. DIY home décor is more accessible than ever, and with the right tools, a clear plan, and a bit of courage, you can transform any room on a budget that actually makes sense. This guide walks you through every stage, from gathering your kit to putting the finishing touches on a space that feels genuinely yours.
Table of Contents
- Essential tools and materials for DIY home décor
- Planning your DIY décor project: inspiration to action
- Step-by-step: creating your first DIY décor project
- Troubleshooting and perfecting your décor
- What most DIY guides miss: embracing creativity and mistakes
- Discover beautiful décor solutions with IW1T
- Frequently asked questions
Key Takeaways
| Point | Details |
|---|---|
| Start with a plan | Preparation saves time, money and leads to more stylish, personalised results. |
| Right tools matter | Investing in quality, multipurpose tools ensures better outcomes and fewer headaches. |
| Learn from mistakes | Every misstep is a chance to personalise your décor and build your DIY confidence. |
| Affordable décor is possible | With simple projects and smart sourcing, a small budget can make a big visual impact. |
Essential tools and materials for DIY home décor
Before diving into any project, you'll need the right tools and materials to ensure success. Skipping this step is one of the most common reasons DIY projects go sideways. Proper tools for measuring, cutting, and assembling genuinely improve both your results and your safety, so it's worth getting this foundation right from the start.
Here are the must-have tools for most home décor projects:
- Tape measure – essential for accurate sizing before cutting or hanging
- Spirit level – keeps shelves, frames, and features perfectly straight
- Hammer and nails – for hanging, assembling, and fixing
- Screwdriver set – flathead and Phillips for most fixtures
- Utility knife – precise cutting for wallpaper, vinyl, and card
- Paintbrushes and rollers – a range of sizes for walls and detail work
- Sandpaper (various grits) – smoothing surfaces before painting or finishing
For materials, your choices depend on the project, but these cover most beginner builds:
| Material | Common uses |
|---|---|
| Emulsion paint | Feature walls, furniture upcycling |
| Wood offcuts or MDF | Shelving, frames, small furniture |
| Strong adhesive | Bonding tiles, trims, and decorative panels |
| Fabric and ribbon | Soft furnishings, wall hangings |
| Wallpaper or vinyl wrap | Accent walls, drawer liners, furniture updates |

In the UK, retailers like B&Q, Wickes, and Hobbycraft stock a solid range of affordable supplies. You can also find quality DIY supplies online, which saves time and often money compared to browsing in-store.
Pro Tip: Invest in multipurpose tools wherever possible. A good cordless drill with multiple attachments, for example, replaces several single-use tools and takes up far less storage space in a small flat or house.
Planning your DIY décor project: inspiration to action
Now that you know what you need, the next step is planning your project to ensure the best results. Jumping straight into a project without a clear vision is how you end up with three tins of the wrong paint colour and a shelf that doesn't fit the wall. Setting a clear plan avoids common DIY pitfalls such as wasted materials and design mismatches.
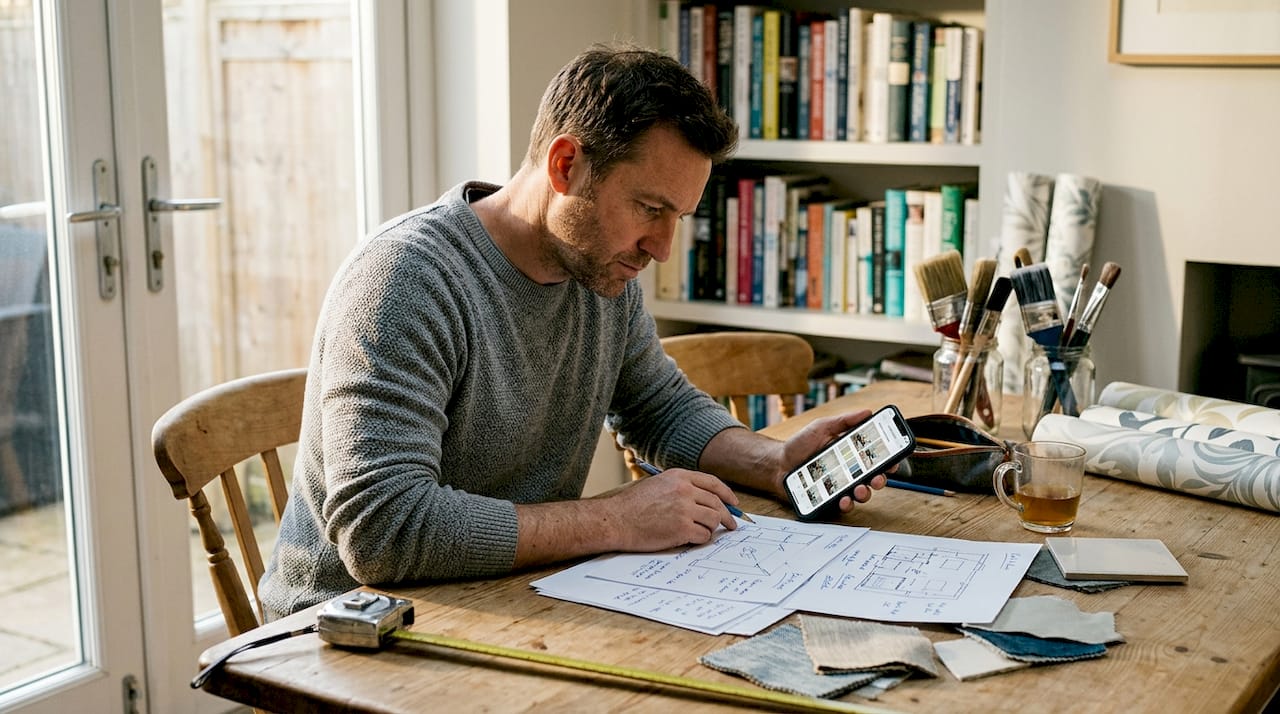
Start by gathering inspiration. Pinterest boards, interior design magazines, and even a wander around home stores can spark ideas. The key is to filter what you find through three practical lenses: your space, your budget, and your current skill level. A dramatic floor-to-ceiling mural looks stunning online, but it might not suit a narrow hallway or a first-time decorator.
Common planning mistakes to avoid:
- Not measuring the space before buying materials
- Choosing a colour or finish without testing it first
- Underestimating how long a project will take
- Neglecting surface preparation (this ruins even the best paint job)
- Overcomplicating a first project by combining too many techniques
Once you have your idea, sketch it out. It doesn't need to be artistic. A rough pencil drawing with dimensions noted is enough to spot problems before they cost you money. From there, follow this simple checklist to move from inspiration to action:
- Choose your project and define the goal
- Measure the space and note all relevant dimensions
- Set a realistic budget with a small contingency (around 15% extra)
- List every material and tool you need
- Research any techniques you haven't tried before
- Set a start date and a realistic completion window
Browsing stylish accessories online can also help you visualise how finishing touches will pull a room together before you even begin.
Pro Tip: Start with a small, low-cost project like repainting a single wall or upcycling a picture frame. Completing something successfully builds real confidence and teaches you more than any tutorial video.
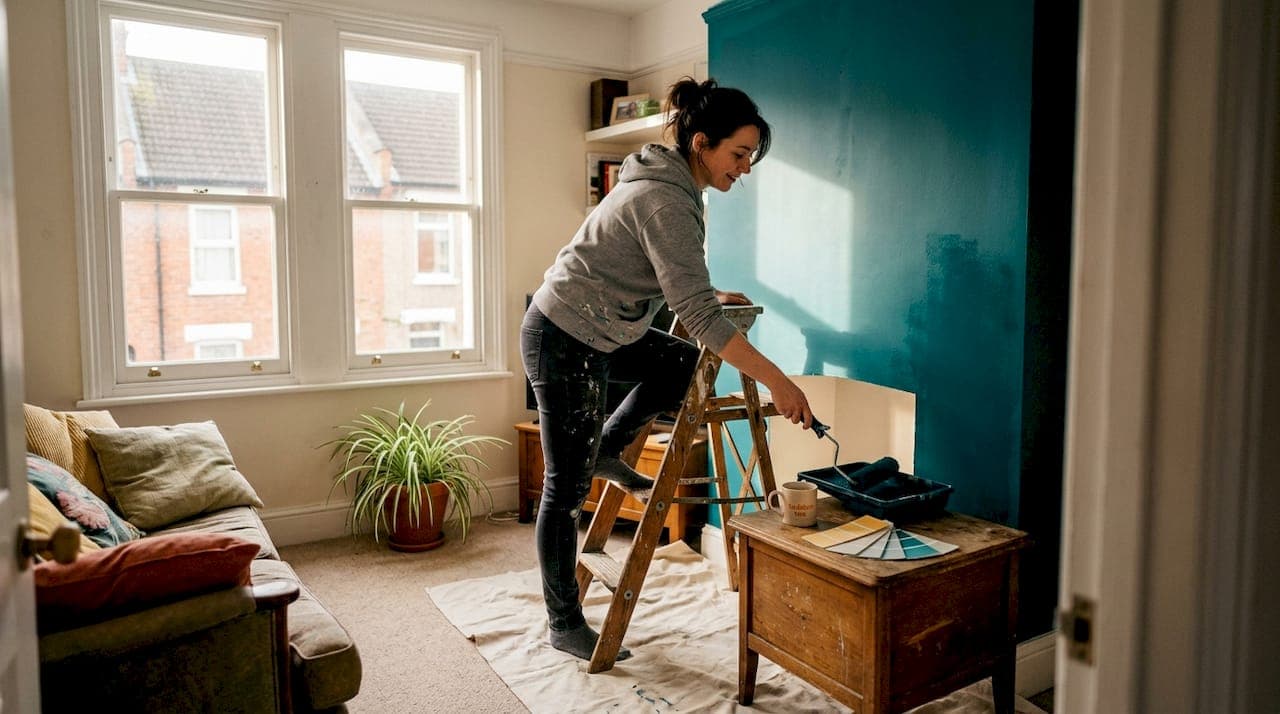
Step-by-step: creating your first DIY décor project
With a clear plan in hand, it's time to bring your project to life, step by step. For this walkthrough, we'll use a painted feature wall as the example. It's one of the most impactful changes you can make to a room, and step-by-step guides genuinely improve project success rates for beginners.
- Clear and clean the wall – Remove furniture, pictures, and fixtures. Wipe the wall down with a damp cloth to remove dust and grease.
- Fill any holes or cracks – Use a ready-mixed filler, let it dry fully, then sand smooth.
- Tape off edges – Apply painter's tape along skirting boards, ceiling edges, and any adjacent walls to protect them.
- Apply a primer if needed – If you're painting over a dark colour or bare plaster, a coat of primer saves paint and improves coverage.
- Paint your first coat – Use a roller for large areas and a brush for edges. Work in sections and maintain a wet edge to avoid lap marks.
- Allow full drying time – Check the tin for guidance. Rushing this step is the most common beginner mistake.
- Apply a second coat – This gives depth and even coverage. Most feature walls need two coats minimum.
- Remove tape carefully – Pull it back at a 45-degree angle while the paint is still slightly tacky for a clean edge.
Safety note: When using strong adhesives, spray paints, or chemical strippers, always work in a well-ventilated room. Open windows, wear gloves, and keep children and pets out of the area until products have fully dried or cured.
Not sure whether to paint or wallpaper? Here's a quick comparison:
| Approach | Cost | Skill level | Time needed | Reversibility |
|---|---|---|---|---|
| Painting | Low | Beginner | Half a day | Easy |
| Wallpapering | Medium | Intermediate | Full day | Moderate |
To personalise your feature wall further, consider adding decor accessories for beginners such as floating shelves, framed prints, or decorative hooks once the paint has fully cured.
Troubleshooting and perfecting your décor
Even with careful planning, challenges can arise. Here's how to solve them and finish strong. Most DIY mistakes can be fixed with simple solutions if you address them promptly, so don't panic when something doesn't go to plan.
Common issues and quick fixes:
- Paint drips or runs – Let the paint dry fully, then sand the drip smooth and touch up with a thin coat
- Crooked shelves – Loosen the fixings, use a spirit level to re-align, and re-tighten; fill old holes with filler before repainting
- Gaps around trim or skirting – Apply a thin bead of paintable decorator's caulk, smooth with a damp finger, and paint over once dry
- Bubbling wallpaper – Carefully slit the bubble with a utility knife, apply fresh paste, press flat, and smooth with a seam roller
- Uneven paint coverage – A third coat often solves this; check you're using the correct finish (matt, silk, or satin) for the surface
Finishing touches are what separate a good DIY result from a great one. Swap out dated light switches and socket covers for brushed brass or matte black alternatives. Add a simple trim or picture rail for architectural interest. Style your shelves with a mix of heights, textures, and a few plants.
Pro Tip: Always test finishes or colours on a small, inconspicuous area first. A paint colour that looks perfect on a sample card can look completely different on a large wall under your room's specific lighting.
For a truly polished result, check these finishing items before calling a project complete:
- All edges are clean and sharp
- Hardware is consistent in finish and style
- The space has been styled with layered textures
- Any touch-up paint has been applied and dried evenly
Browsing finishing accessories can give you ideas for those final details that make a real difference.
What most DIY guides miss: embracing creativity and mistakes
Now that you're equipped for success and prepared for challenges, consider this fresh perspective on DIY décor. Most guides focus entirely on technique, as though the goal is to produce something indistinguishable from a professional finish. But here's the thing: the homes that feel the most alive are rarely the most technically perfect.
The pursuit of perfection can actually stifle your creativity. When you're terrified of making a mistake, you play it safe. You choose the beige everyone else chooses. You hang the shelf exactly where the instructions say. And the result is a room that looks fine but feels like nobody lives in it.
Mistakes, on the other hand, often lead to the most interesting outcomes. A paint colour that looked wrong on the wall might inspire you to add a contrasting trim that becomes the room's defining feature. A slightly uneven texture might give a surface exactly the character it needed. The best DIY spaces we've seen weren't built from flawless execution. They were built from genuine curiosity and the willingness to try something, learn from it, and try again.
Approach each project as an experiment, not a performance. The goal is a home that reflects you, not a showroom.
Discover beautiful décor solutions with IW1T
Ready to start your own project or level up your tools and inspiration? At IW1T, we've curated a range of home décor and lifestyle products specifically for people who want their space to feel personal, stylish, and genuinely theirs.

Whether you're after finishing touches for a freshly painted wall, accessories to complete a shelf display, or practical tools to make your next project easier, you'll find it in our collection. Explore our curated DIY décor essentials and discover products chosen with real homes in mind. We're a family-run business based in the UK, and we understand what it means to want a beautiful home without spending a fortune. Let us help you make it happen.
Frequently asked questions
What is the easiest DIY décor project for beginners?
Beginner projects like painting a feature wall or upcycling a shelf are ideal starting points, as they're low-cost, low-risk, and teach you skills you'll use in every future project.
Where can I buy affordable DIY tools and materials in the UK?
Major retailers such as B&Q and Wickes, specialist craft shops, and affordable DIY materials online all offer solid options for beginners working to a budget.
How do I fix common mistakes like paint drips or crooked shelves?
Quick fixes work for most common issues: sand dried drips smooth before touching up, and use a spirit level to re-align shelves before re-tightening fixings.
How much should I budget for my first DIY home décor project?
Most beginners can complete a first DIY project for between £30 and £100, depending on the size of the space and the materials chosen. Always add a 15% contingency for unexpected costs.